Sunday, January 8, 2017

Chicken Pot Pie

from ThePioneerWoman.com
There's something about wanting to be inside at home with a warm meal when the weather outside reaches 3 degrees and the sky is a grey foggy mess.  I'd been meaning to make this dish for a while just out of curiosity, and tonight was the night.  I also was feeling tired and wanted to make this as quick as I could, so I cut as many corners for this recipe (sorry Grandma) and I'll let you know how I did so.

I N G R E D I E N T S
--4 tbsp. butter
--1/2 cup finely diced onion
--1/2 cup finely diced carrot
--1/2 cup finely diced celery
--3 cups shredded cooked chicken
--1/4 cup flour
--3 cups low-sodium chicken broth
--1/4 tsp. turmeric
--salt and pepper, to taste
--chopped fresh thyme, to taste
--1/4 cup half-and-half
--1 whole unbaked pie crust
--1 whole egg
--2 tbsp. water

 Preheat the oven to 375 degrees.  Melt the butter in a medium-sized pot on medium high heat.
 Corner cut #1:  the grocery store had this wonderful combo of celery, onion, and carrots already diced and ready to go.  Before buying these ingredients, look for combos like this in the prepared section at the grocery store!
 Add the diced vegetables to the butter and stir it around, until the onions turn translucent.
 This takes about 4-5 minutes.
 Once the vegetables look ready, add in the shredded chicken and stir it around to warm it up.
 Corner cut #2:  there are many ways to cook a chicken, but there's also a way to avoid this step and buy a dang rotisserie chicken.  I bought one, took two forks to tear the meat off, and didn't even break a sweat.  Worth.  It.
 Add in a little flour and give it a stir for a minute.
 Then pour in the chicken stock and stir it around and allow the mixture to start to thicken/
 Once the mixture starts to thicken, add in the turmeric, salt, and pepper.
 Don't forget the thyme!  The fresher, the better.
 Next up is the half-and-half addition.
 That's it for the pot part! (lol)
 Pour the mixture into a 2-quart size pan and even out the surface.  Check out the pie dough in the background.  Corner cut #3:  I searched the frozen food section (gasp!) and found puff pastry already made, all i had to do was let it thaw in the refrigerator for a couple hours before cooking.
 Combine the egg and water for the top of the pie.
 Brush the mixture all over the top of the pie, and make sure the crust folds over the sides nicely.  Also, don't leave the crust layer too thick.  It may need to be rolled out a little bit before plopping it over.
 Include a couple slits in the pie to allow the heat to have a place to escape.  Then pop it in the oven for about 25-30 minutes.
 The puff pastry crust makes this too much fun to handle.
 And you know you're a foodie when any kind of food is "too much fun to handle."

Friday, January 6, 2017

Vanilla Cake w/ Fluffy Chocolate Frosting

recipe from ThePioneerWoman.com

One of my New Year's resolutions this year was to share more recipes with people.  Not sure why I had to take a year hiatus from doing this, but anyway, I'm back! (for now...)  My little nephew celebrates his birthday five days after mine (lucky boy!!) so I decided to go classic and do the chocolate and vanilla duo.  When both the cake and frosting turn out good enough, sometimes the most simple flavors turn out the best.

I N G R E D I E N T S
-For the cake-
-1 1/2 stick (3/4 cup) butter, softened
-1 3/4 cup granulated sugar
-3 whole eggs, room temperature (!!!)
-2 1/2 cups cake flour
-2 1/2 tsp. baking powder
-1/2 tsp. salt
-1 tsp. vanilla
-1 1/4 cup whole milk

-For the icing-
-2 stick butter, softened
-4 cups powdered sugar
-3/4 cups cocoa powder
-1/4 tsp. salt
-1/3 cup heavy cream

 First things first, I'm the realist (name that song big lolz), preheat the oven to 375 degrees.  Also, thoroughly spray/grease a 9x13 baking pan.  Then in the bowl of an electric mixer with the mixer fitted with the whisk attachment, throw in the butter and beat until it's soft and fluffy, about 30 seconds.
 Kewl.
 Whip it real good.
 Add the sugar in batches, about a 1/4 a cup at a time, with the mixer on medium while you pour.
 Scrape down the sides of the bowl, then mix again until totally combined and fluffy, about 2 minutes.
 Don't snitch yet.
 During those 2 minutes, you can get your dry ingredients ready!  In a separate bowl, mix together the cake flour, baking powder, and salt.
 Once the 2 minutes is up for the butter and sugar, add in one egg at a time, mixing well between each one.

 Then add in the vanilla.  (Side note--I'm very particular about which vanilla I use *cough cough thanks mom*.  If possible, try to track down Traditional Mexican Vanilla.  It is sold at The Store grocery store and other places, so be on the lookout.  It will transform your baking results overtime, guaranteed.)
 Take turns adding in some of the dry mixture...
 With the milk, until it's all added and mixed together.
 Then scrape the sides of the bowl, and let the mixer go on high speed for about ten seconds to make sure everything is really blended.
 "What dreams are made of"--Hilary Duff
 Pour the batter into the greased pan and use your spatula or knife to even out the surface before putting it in the oven.  Let it bake about 22-25 minutes, or until the top is nicely browned and the middle doesn't jiggle.
 Allow cake to cool completely before dressing it up with icing.
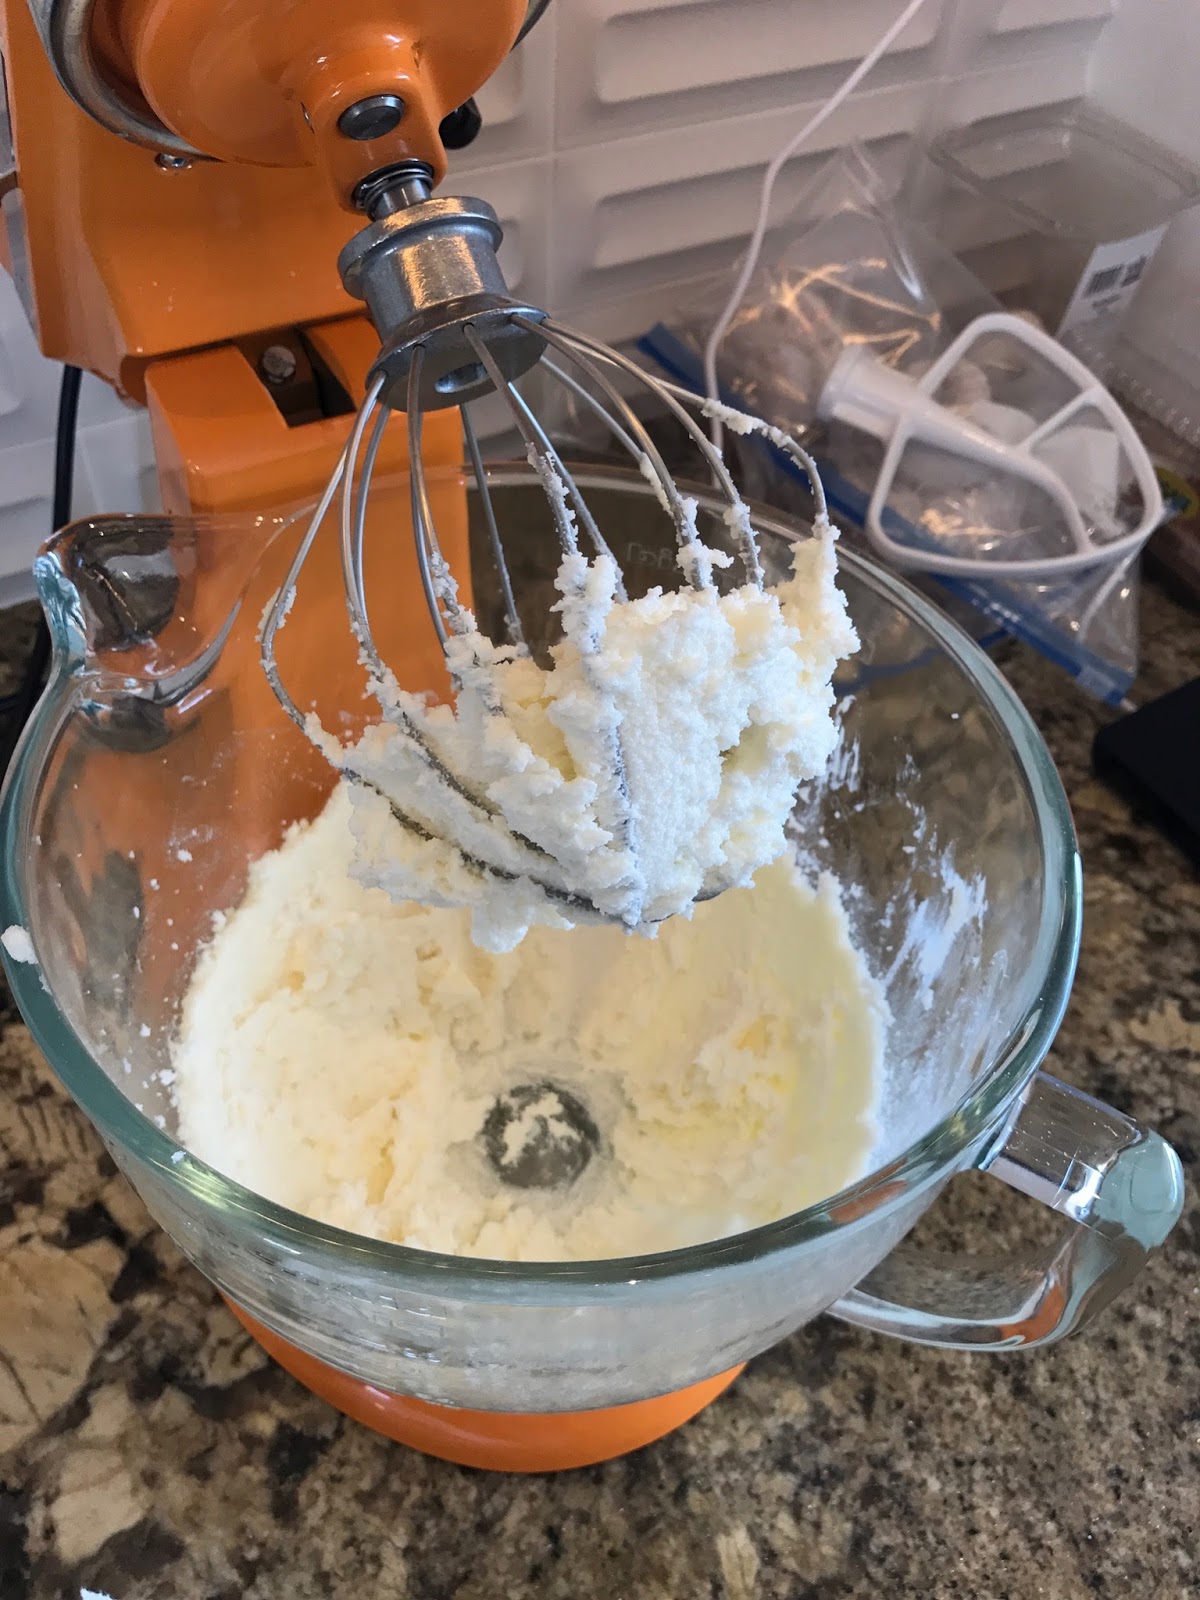
 SO....while the cake is cooling, keep yourself busy and start on this amazing frosting (did I mention it's amazing?).  Start the same way you did with the cake by dropping in your butter, except THIS time notice I am using a paddle attachment for the mixer.
 Whip the butter until totally soft and smooth, and super creamy.
 In a separate bowl, add the powdered sugar, cocoa powder, and salt and stir together.
 Then gradually add the mixture to the butter, with the mixer on low (or you'll be sorry).
 If your mixture soon starts to resemble topsoil, congratulations!  You'll then start to drizzle in the heavy cream, and whip on high until it all starts to come together and look like the frosting of your dreams.
 Can you hear me now?
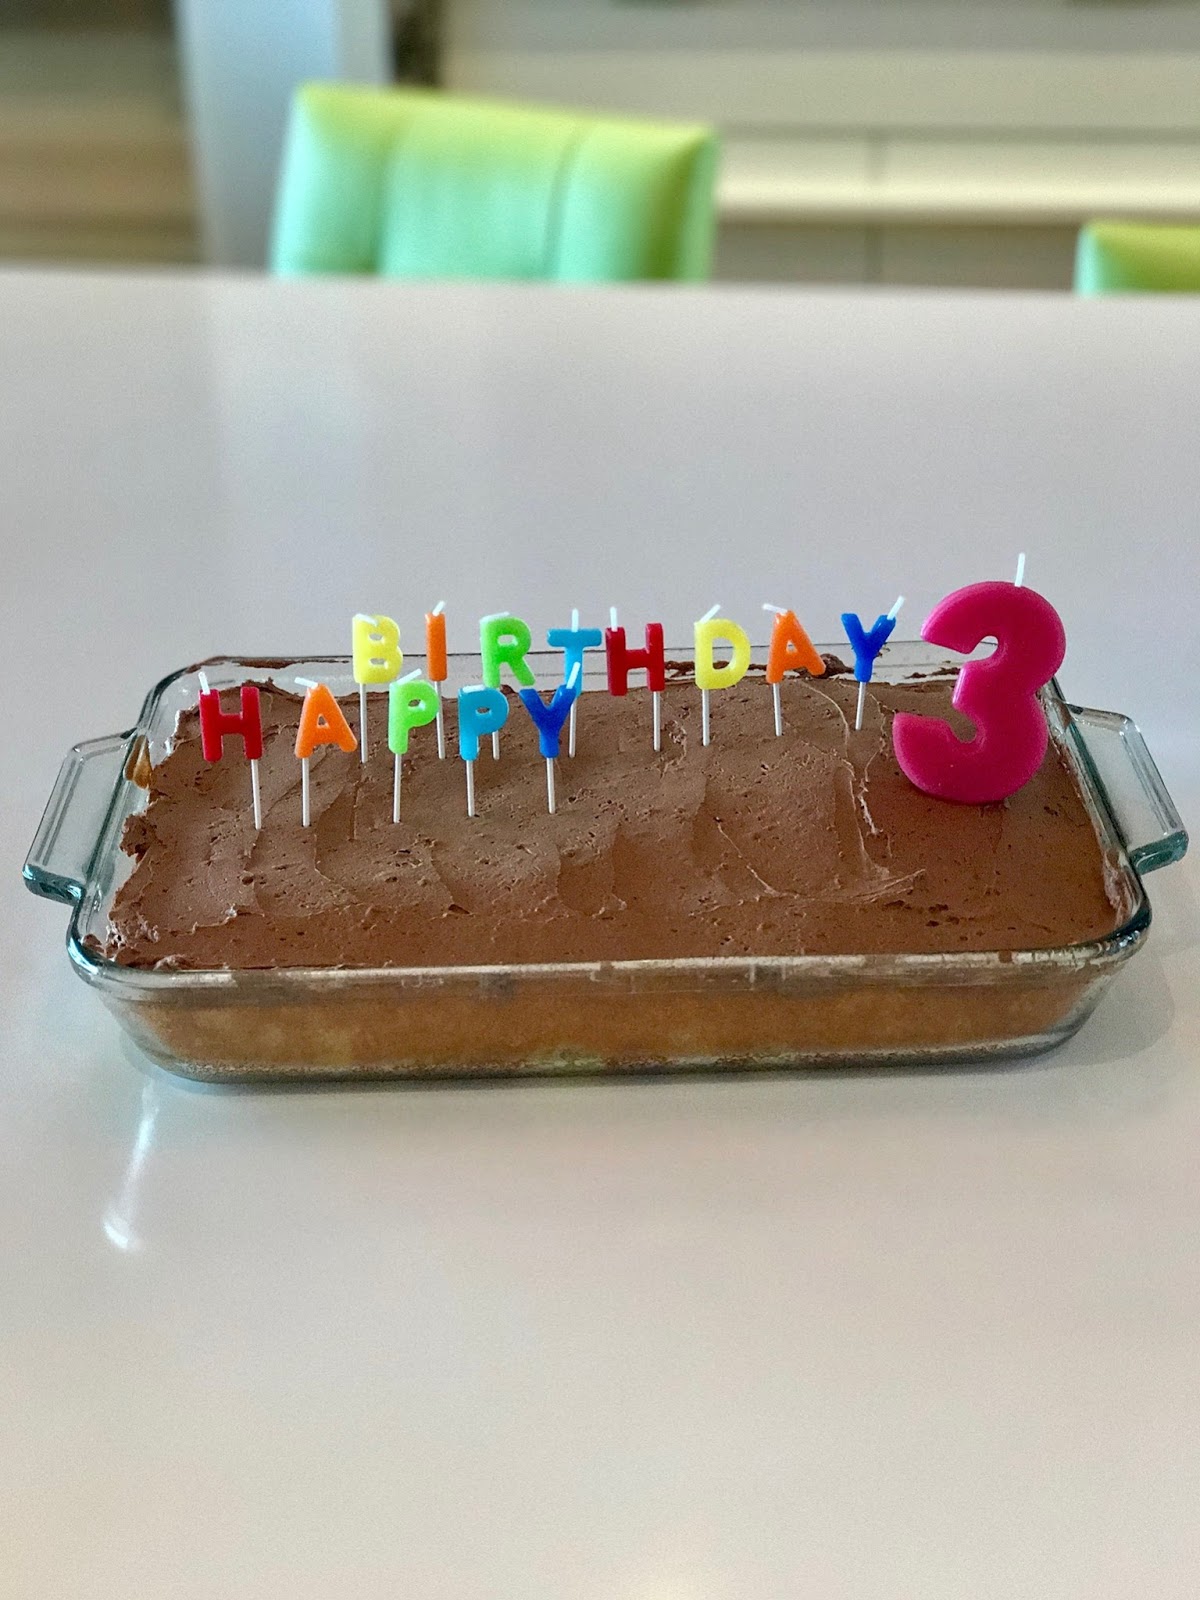
 CAN YOU HEAR ME NOW??  Good.  Pile it on high to your cooled cake and watch birthday wishes come true!

 Happy birthday Truman!!, and Happy New Year Mom, Dave, sisters, (and is anybody else reading this??????)


Wednesday, December 23, 2015

Soft Gingerbread Cookies

Sugar and spice, and everything nice, except I've always been more partial to the spicy side (LOL).  These cookies should be made all year long, but December seems the most logic time to make them.  This is my favorite ginger cookie, and as a ginger myself who better to trust???

I N G R E D I E N T S
 --2 1/4 cups flour
--2 tsp. ground ginger
--1 tsp. baking soda
--3/4 tsp. cinnamon
--1/2 tsp. cloves
--1/4 tsp. salt
--3/4 cup (1 1/2 stick) softened butter
--1 cup granulated sugar
--1 egg
--1 tbsp. orange juice (trust me!!!)
--1/4 cup molasses

--frosting--
(not pictured ingredients)
--4 cups powdered sugar
--1 stick softened butter
--2 tsp. vanilla
--3-5 tbsp. milk
 --Preheat oven to 350 degrees before you forget!  In a large bowl, combine the dry ingredients (flour, baking soda, ginger, cinnamon, cloves, salt) and set aside.
 --In the bowl of an electric mixer (because it's so much easier than working those arms), beat sugar and butter until fluffy, then add in your egg.
 --Next mix in orange juice...
 --And your slow molasses.
 --It should look like dis.
 --Gradually add in the dry ingredients with the mixer on low (gradually because the poof of flour after dumping in large amounts of flour in a turning mixer is real) until it's all combined.
 --Voila!
 --Turn dough onto a plastic wrap and wrap dough, placing it in the fridge for about 30 minutes to chill.  For rolling purposes, the dough is a lot more manageable when cold!
 --Find a flat surface and roll this baby out with a ton of flour underneath it and coating your rolling pin!
 --Find your cutest little guy and make a ton of them (I also just did circles woohoo).
 --Place on a cookie sheet with enough space in between them to grow a little bit.
 --Bake for 8-10 minutes, until there's little crackly surfaces on the guys!
 --Who else scrolled up to the last picture after seeing these??  Yes, the puffing will go down after they cool!
 --Now, you can leave them as is and they'll be super delicious, or you can pair these with your favorite frosting!  The one I use is super simple.  If you already have one in mind, skip these steps:
--In the bowl of an electric mixer, cream butter until super fluffy, then add in vanilla and 3 tbsp. milk.
--dump in powdered sugar, and slowly mix together until it starts combining, then switch the speed to high and add in any additional milk in until it's the consistency you like!
 --You can add red cinnamon candies to make eyes and they look sort of like mute ghosts.
 --So add a smile to these guys! LOL I had too much fun creating these men.
 --They sort of looked like a team of some sort...
 --So I turned them all into Utah Jazz.  Big LOL but it made some of these guys taste even better.  Like #27 and #33 were the best.
 --Happy holidays from all of us^^^to you!!!

XOXO