Sunday, September 27, 2015

Churro Waffles

from seriouseats.com
My dream was to have a churro cake for my wedding.  When I couldn't figure out how to construct that, I still made sure to serve them so everyone could enjoy the best dessert ever.  The decision to make churro waffles was unanimous at our household tonight, and this recipe is so easy I didn't feel like I needed to take pictures for steps (okay I just didn't think to get my camera out before, oops!)

I N G R E D I E N T S
--1 cup water
--8 tbs. (1 stick) unsalted butter
--1/2 tsp. salt
--2 tbs. sugar
--1/2 cinnamon
--1 cup flour
--4 eggs

--melted butter, 1 cup sugar, 2 tsp. cinnamon for coating

D I R E C T I O N S
In a medium saucepan, melt butter, water, cinnamon, salt, and sugar and bring to a simmer.  Add in flour and stir while on the stove.  This will turn into a thick batter super quickly.  Don't be alarmed!  It is fine! (lol heavyweights)  Continue to stir for a minute longer and then remove from heat for about three minutes.  Add in the eggs, one at a time, whisking together until it's the consistency of buttercream frosting.  Meanwhile, heat up a waffle iron and spray with nonstick spray or coat with butter (choose the latter).  Scoop small amounts of dough into the iron.  The dough will expand while cooking, so don't try to fit too much in!  Once cooked, dip each waffle in the butter and roll in cinnamon sugar mixture.  And then eat all of them while they're hot.  And for goodness sakes get started on this now!!


XOXO

Sunday, September 20, 2015

Buttered Rosemary Rolls

from The Gathering of Friends Cookbook, Vol. 5
Raise your hand if you've ever felt intimidated by recipes that call for yeast....*insert emoji of girl raising hand*  The tricks for dealing with yeast include using the right temperature for warm water, and patience!  I assure you these rolls are possible and are easy, you may even have all these ingredients already!
I N G R E D I E N T S
--3 tbsp. active dry yeast
--1 cup warm water (a little hotter than warm)
--1/4 cup honey
--1 tsp. salt
--1 egg
--3 cups flour
for the top
--3 tbsp. butter, melted
--1 tsp. rosemary flakes
--1/2 tsp. salt
 --Preheat the oven to 400 degrees.  In a mixing bowl combine yeast and warm water and let these two ingredients bubble up for about 5 minutes.
 --...5 minutes later.

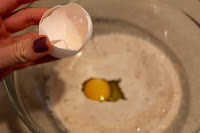
--Add in one egg, the honey, and salt.
 --Whisk this together until well blended.
 --Measure out the flour and add this into the yeast/honey mixture.
 --Stir this until the dough begins to come together.  Then, on a floured surface, knead the dough until it comes together and is soft and elastic, about 6-8 minutes.
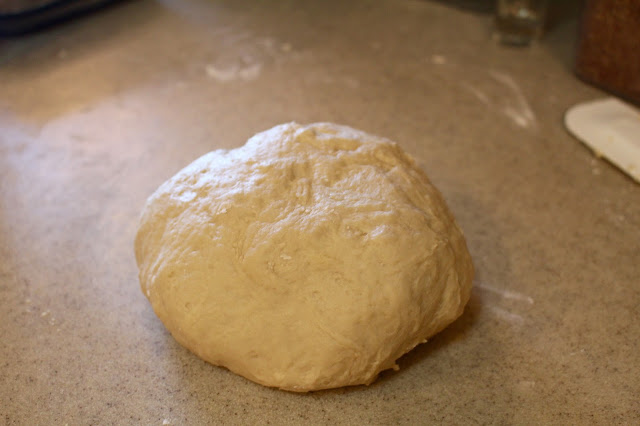
 --This is what I got after kneading for 6 minutes.  Compare the difference between when I started and ended.  Don't think your dough is wrong when it looks flaky, it will become more workable the longer you play with it!
 --Put the dough in a well oiled bowl and cover it in plastic wrap and place in a warm place to rise for 2 hours.
 --This is after one hour.  LOL it's blurry because my camera wanted to focus on the plastic wrap really bad.
 --After two hours, punch down the dough and divide into small balls...
 --...about the size of golf-balls.  Place them 2 inches apart and cover with kitchen towels to allow more rising for 20 minutes.
 --Before popping these in the oven for 11 minutes, brush each one with butter and sprinkle over some salt and rosemary to elevate them to amazing-ness.
 --In case you forgot what they turn out like!

 XOXO

Pasta Carbonara

from The Gathering of Friends, Vol. 3
Pasta, bacon, cream, is it possible to create a better sounding dish??  If you can think of one, please let me know.  However, I've yet to meet someone who has ever turned down this meal (except my mom, the vegan).  This recipe comes from a line of the best cookbooks ever, The Gathering of Friends.  I used spinach linguine instead of regular spaghetti to add some color and make it a tad heartier.  Also, I 1 1/2 this recipe when feeding 12.  The quantities listed are for 8 servings.  Enjoy!

I N G R E D I E N T S 
--1 lb bacon
--1 shallot
--4 cloves garlic
--20 oz. sphaghetti (I used De Cecco spinach linguine)
--4 eggs
--1/2 cup heavy whipping cream
--6 green onions
--1 cup. fresh Parmesan cheese
--salt and pepper, to taste
--Start by doing a little bit of prep work.  Fill a large pot with water and bring it to a boil.  For some reason this always takes a while to happen, so I always begin with this step.  Then begin chopping up a few things.  Namely your bacon.  I refrained from putting this as my screen saver.  With a sharp knife (or clean kitchen scissors!) slice bacon into 1-inch pieces.
--Next, peel your shallot and dice that up as well.
(if you have your garlic cloves, dice those up as well.  I have a jar of already diced garlic and it' s a life saver!)
--In a heavy pot, or deep saucepan, over medium heat, cook the shallots until they give off a nice aroma.
 --Next, add in the garlic and stir around so it doesn't burn.
 --Add in the bacon and stir occasionally until cooked, about 10 minutes.
 --Meanwhile, more prep work!  In a small bowl, beat the eggs and cream together and add in some salt and pepper.  Set aside.
 --Rinse off the green onions and dice up a pretty pile of them.  Either put them in a separate bowl (if you're entertaining picky eaters like I love doing), or set them aside to sprinkle in before serving.
 --Check back on that bacon that's making your home smell so divine.  Turn heat off the cooked bacon and let stand covered.
 --When the water has (finally) began bubbling, add in the pasta and cook al dente (with still a little bite to it) according to the box directions.  Then drain and place in a large serving dish.
 --Add in the bacon and all it's glorious drippings from the pot.  Once this is stirred, grab your bowl of egg and cream and pour that in while mixing the pasta.
 --This beautiful event occurs where the hot pasta cooks the egg/cream mixture and creates a thick beautiful covering over all the noodles.
 --Keep some parmesan and green onions on the side for adding more decadence to the pasta!  Ahh, if only bacon and cream counted as fruits and veggies.

XOXO

Friday, September 18, 2015

Raspberry Oat Cookies

recipe from sallysbakingaddiction.com

Some of these steps for this recipe may sound a little nit-picky, but it will help ensure that your batch of cookies turns out as delicious as it should!  (p.s. sorry for the hiatus)

SIDE NOTE:  I doubled this recipe and it made ~40 cookies, so under ingredients I'll put side by side how much to do if you want to do the recipe with normal quantities!

I N G R E D I E N T S
--1 cup (2 cups) instant oats measured correctly!!
--3/4 cup (1 1/2 cups) whole wheat flour measured correctly!!
--1 1/2 tsp. (3 tsp.) baking powder
--1/2 tsp. (1 tsp.) cinnamon
--1/8 tsp. (1/4 tsp) salt
--2 tbsp. (1/4 cup) coconut oil, melted
--1 (2) large egg, room temperature
--1 tsp. (2 tsp.) vanilla extract
--1/2 cup (1 cup) honey
--6 tbsp. (3/4 cup) fresh raspberries

--Preheat the oven to 325 before getting started.  To make your own instant oats if all you had was old fashioned (me), pulse them in a food processor about 5 times and you're golden!  
 --In a large bowl, CAREFULLY measure out your oats before tossing into the bowl.  The technique I like to use is to scoop out the quantity and then level it off with a knife instead of packing it down.  This will help with your consistency!!
--Next, measure out your flour as carefully as you did with the oats and dump it into the same bowl.
--Next comes the baking powder, cinnamon, and salt, and stir together.
--In a separate bowl pour in the melted coconut oil, vanilla, and egg(s).
 --Pour in the honey and mix together until it's an even consistency.  Then add the wet ingredients to the oat/flour mixture and stir until just combined.
--I promise I didn't forget about the raspberries!  Dice those beauties up nicely until they're the consistency you desire.
 --Fold the berries into the bowl and stir until they are evenly distributed.
 --IMPORTANT STEP!  Place plastic wrap over the dough so that the surface is touched by the wrap, and chill for at least 30 minutes, an hour if possible.  This is important because the raspberries will emit juices while baking and the cookies need a little extra help keeping their shape!
 --After the chilling stage, scoop ~tablespoon size mounds onto a parchment-lined baking sheet and press down on each cookie, flattening it a bit.
 --Bake for 13-15 minutes, and then pull them out of the oven and continue to let them cook on the baking sheets for another 15 minutes before transferring them to a cooling rack
 --Since my cookies were bite size (big bites), I pulled them out on the early side (13 minutes) and they kept their shape nicely.
--The beautiful bits of raspberries cause the shapes of the cookies to be more rustic-looking, which is perfect because who wants a perfectly round cookie??
 --If stored in an airtight container, these can last up to a week while still staying soft!......if they last that long!

XOXO